Wednesday, July 31, 2013

Greeting Card Campaign: 7/31 Devoted Couples Day

Happy Devoted Couples day.  It's also Best Friends Day and National Mutt's Day, but you can't pass up "Devoted Couples Day" if you want to make an impression with that romantic greeting card. There's no food that goes with this one, only pure love. But don't worry this side fold card is sweet enough to get you onto her good side.


It's a side fold.  Follow the usual procedure:
  1. Download the full page photos above by right clicking and then clicking on "save as"
  2. Open your word-processor or publishing program.
  3. Create a blank two page, double-sided, landscape format document.
  4. Turn the photos sideways and paste to cover the document front and back.
  5. Print on cardstock on normal or better settings.  Print two-sided with both pictures facing the same direction and flipped on the short side if you have a double-side printer.
  6. Fold in half vertically and sign your name with appropriate expressions of love and affection.
 This is a good one for an "out to eat someplace romantic" tactic.  Enjoy the day with your devoted loved one.

© 2013 by Tom King


Greeting Card Campaign: 7-30 Deviled Egg Day

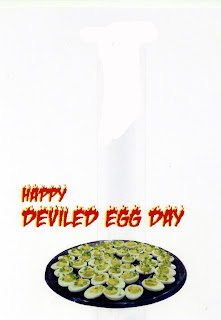
Well, it looks like we're continuing our tasty treats theme this week with "Deviled Egg" Day, a day on which we all celebrate the delightful deliciousness of that pot luck delicacy - the deviled egg.  Though no one is sure why cutting a boiled egg in half, smushing up the yokes with mayo and pickle relish made them "deviled" eggs, but they certainly are a devilishly delicious treat that goes with almost anything.


We've gone with a top fold card this time.  Remember to print the inside of the card upside down with respect to the outside of the card.  Here's the procedure for a top fold card:

It's a side fold.  Follow the usual procedure:
  1. Download the full page photos above by right clicking and then clicking on "save as"
  2. Open your word-processor or publishing program.
  3. Create a blank two page, double-sided, portrait format document.
  4. Paste the photos on the front and back of the page in your document.the photos should cover the entire page outside and inside.
  5. Print on cardstock on normal or better settings.  Print two-sided with both pictures facing the same direction and flipped on the long side if you have a double-side printer.
  6. Turn the card sideways and fold in half vertically, sign your name with appropriate expressions of love and affection.
It's even better if you make some deviled eggs for her to go with the card. They are delicious. Even your angel will think so....

© 2013 by Tom King

Monday, July 29, 2013

Greeting Card Campaign: 7-29 Lasagna Day

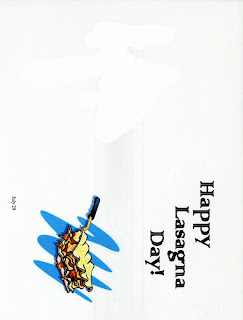
Okay, now this is a thing worth celebrating.  It's Lasagna Day, hip, hip, hooray.  I'm with Garfield on this one - Italian food is supposed to be the food of romance. Well I think lasagna is the most romantic danged thing anyone ever invented.  To celebrate we have this card.


It's a side fold.  Follow the usual procedure:
  1. Download the full page photos above by right clicking and then clicking on "save as"
  2. Open your word-processor or publishing program.
  3. Create a blank two page, double-sided, landscape format document.
  4. Turn the photos sideways and paste to cover the document front and back.
  5. Print on cardstock on normal or better settings.  Print two-sided with both pictures facing the same direction and flipped on the short side if you have a double-side printer.
  6. Fold in half, sign your name with appropriate expressions of love and promises to take her out to the Olive Garden tonight.
You can't beat that with a romantic stick!

© 2013 by Tom King

Greeting Card Campaign: 7-28 National Milk Chocolate Day

If you are doing the 365 days of greeting cards campaign in order to atone for forgetting some important date, today's card should help a lot.  It's National Milk Chocolate Day.  I'm not sure who came up with it.  It may have been a woman with a craving. It may have been a man in trouble.  At any rate, this card and a pound or two of chocolate fudge or a box of chocolates ought to help make the love of your life smile. 


It's a side fold card.  Easy to do.  Download the images by right-clicking and choosing "save image as". Place both pictures on their side in a landscape document covering the whole page front and back.  The pictures should both be turned the same way.  Print the card so that it flips on the short side.  Use a nice feminine cardstock with this one. 

And don't forget the chocolate!


© 2013 by Tom King

Saturday, July 27, 2013

Greeting Card Campaign: 7-27 Walk on Stilts Day

Tell her she makes you feel ten feet tall with this "Walk on Stilts Day" greeting card.  Where this holiday came from, I'm not sure, but the idea is to try out a pair of stilts today. Though that is not likely at my advanced age, I owned several homemade pair in my youth and could get about quite nicely on them.  Made me about 6 or 7 feet tall and at age 11, it was interesting to get a view from grownup altitude.  Made me realize just how small I looked to the grownups.


This card is a side fold, so when you place the pictures in the document, both should be in landscape format and both pictures right side up.  The pictures are standard 8 1/2 by 11 cardstock size.  Just right click, download the pictures, put them into your word processor or publishing program and print up your card. Leave it in some surprise place for her to find.

© 2013 by Tom King

Friday, July 26, 2013

Building A Really Great Homemade Reflector Telescope: Part 1 - The Dobson Mount


Amateur astronomer John Lowry Dobson, co-founder of the San Francisco Sidewalk Astronomers group is the inventor of a simple telescope mount design that is easy, inexpensive and effective. The "Dob" as it has been affectionately known by amateur astronomers on a budget for over 50 years, is made up out of plywood, old phonograph records and an assortment of nuts and bolts and felt strips.  Because you save so much money on the mount (which tends to be rather expensive if you buy a professionally made one) you get to spend your money on bigger mirrors and more powerful lenses.  We're going to assume a 10-inch Newtonian reflector telescope.  A 10-inch reflector has a 10-inch mirror. The actual tube will be more like 12 inches in diameter to accommodate the mirror mount.  We'll give you the general instructions for building the scope itself in Part 2 of this series, but for now we'll start with the mount itself.  If you already have bought the tube, you can use the tube to get the dimensions of the mount right.

We're going to assume some rudimentary carpentry skills. Be sure and double check measurements against the tube you will be using to insure it will fit in the cradle properly.  
 

You'll need a bit more than a 4x4 sheet of plywood to build a 10 inch scope.  This cutsheet diagram fails to account for the extra inch in the 18x13 front piece, so I just get a 4x8 sheet of plywood and cut the 18x13 piece out of the extra wood. You could use a 4x4 sheet of plywood for anything smaller than a ten inch scope - an 8 inch for instance would only need an 18x9 inch front. It's pretty easy to pair this design down or expand it to fit other size scopes.

This is what
you'll need in the way of materials:

Materials

  • Ten inch Newtonian reflector telescope (12 inch outer diameter tube)
  • 4 x 8 foot sheet of half inch plywood
  • Two unwanted phonograph records
  • Felt
  • Glue that will stick to vinyl and wood
  • Saw
  • Drill and bits
  • Screws - 1 and 2 inch
  • Wrench
  • ½ inch by 3 inch carriage bolt, washer and nut (wing nut optional).

Building the Dobsonian Mount

There is a matching "ear" on the other side of the tilt box
Step 1
To make the tilt box, cut out a pair of 12x12 inch plywood squares.  Set these aside

Step 2
Cut out  and two 12x13 inch plywood squares. 

Step 3
Fit the plywood squares together to form an open-ended box. Lightly nail it together to form a 12x12 inside diameter.  Try fitting the tube of your telescope through the box.  It should fit snugly.

Step 4
The 12x13 squares will overlap the ends of the 12x12 squares so that you have an inside diameter of 12x12 inches.  Don't try to miter the ends.  Drill small holes in the overlap, glue and screw the 12x13 squares to the 12x12 squares so you have a sturdy open ended box.  

Step 5
Cut two 6 inch diameter plywood circles for the “ears” of the mount. Sand the edges smooth.

Step 6
Glue and screw the flat disks to the center of opposite sides of the mounting box. Do not put screws all the way through the sides of the tilt box and leave the center of each ear clear for a mounting screw to be added later.

Side view of the rotating stage
Step 7
Cut two 12 inch diameter circles out of plywood. These will form the rotating "stage" on which you will mount the upright support box.

Step 8
Drill a half inch hole in the center of both disks. One will be the lower stage. You will need to drill a shallow ¾ inch recess hole in the hole in the lower stage to allow a slight recess for the carriage bolt that will hold the lower stage to the base. The carriage bolt head will be fully recessed. The picture shows the head sticking up a bit to make the assembly easier to understand, but must be recessed fully or the stage will wobble when set on the ground. 

Step 9
Insert the carriage bolt through the lower stage so that the head is recessed.  Turn the stage over so the 3-inch carriage bolt sticks straight up.  

Step 10
VERY CAREFULLY Drill half inch holes the centers of the phonograph records.  

Step 11
Glue the bottom of one record, slide it over the lower stage bolt and press firmly against the lower stage and let it dry.

Step 12
Match up the hole in the second record with the hole in the upper stage and glue it in place and let it set firmly.

Step 13
Flip the upper stage over so the record side is down and slide it over the bolt and down onto the lower stage so that the records rub together.  

Step 14
Bolt the two stages together.  I like to use a wing nut so I can adjust the tension in the field or disassemble the whole thing when transporting it. Adjust the tension on the nut so that the upper stage turns smoothly, but has some friction to keep the stage positioned once you have it where you want it.

This is what the mount looks like
complete and attached to the stage
Step 15

Cut two 26x12 inch rectangles out of your plywood. These two pieces will form the sides of the mounting pillar.  

Step 16
Now cut an 18x13 inch rectangle to make the front of the mounting pillar.  The pillar will have three sides and be open on one side so the tube can be positioned to point directly overhead.  

Step 17
At this point you are going to make the pillar. Use both glue and small screws to make the pillar for added strength.  Predrill the screw holes so the wood doesn't split when you drive the screws in.  Position the side pieces on their long edges and lay the front piece so that it's bottom edge is even with the bottom edge of the sides.  Where the top will be, the sides will stick up 8 inches above the front piece.  This allows the telescope to be pointed horizontally and even to be depressed slightly below 90° to catch near horizon objects if you're viewing from a height.

Step 18 
Cut a semi-circle arc out of the top edge of the sides of the pillar mount as shown.  This will form the cradle for the ears of the mounting box.  A 6-1/8 inch circle should work nicely.  

Step 19
Sand the cradle and glue a piece of felt to the inside edge of both circular cradles.

Step 20
Glue the pillar mounting box to the top of the upper stage of the base. Drill screws through the edges of the pillar mount int the stage.  Be careful not to screw all the way through the upper stage or it will prevent the stage from rotating properly.


This version with the tilt
box in place adds holes in the
sides and front to reduce weight
Step 21
The mounting box is turned with the ears at the side.  Glue felt around the edges of both ears. This provides the friction needed to hold the telescope in place. 

Step 22
Set the ears of the mounting box into the curved cradles in the upper sides of the pillar mount. 

Step 23
You can paint or sand and varnish the mount as you like. You're pretty much done for now.

When the telescope is mounted in the Dob mount, it will be able to rotate and elevate from below the horizon to straight overhead. The Dob mount is a steady platform. When you have the telescope mounted, you'll need to spend some time adjusting the tension on the stage bolt and the friction between the cradle and the mounting box ears.  If the telescope is balanced properly in the mounting box, adjusting the elevation should be a matter of a soft push to make is slide smoothly to the next position you desire.  The Dob is all about balance.

Our next step will be to complete our telescope and mount it in the Dobsonian mount you've just constructed.  Stay tuned for part 2.


References:

Sidewalk Astronomers: Building a Dobsonian Telescope

Homemade Astronomy: Larry Brown

Plans For A Homemade Dobsonian Telescope

Scopemaking: Homemade Telescopes

The Pickle Bucket Telescope

A Homemade Telescope

© 2013 by Tom King

Greeting Card Campaign: 7-26 National FBI Day


July 26th is FBI Day!  Yippee skippy!  What would we do without G-men (and G-women nowadays).  FBI Day is a recently proclaimed holiday, originally proclaimed on July 26, 2008, by then President George W. Bush on the Federal Bureau of Investigation's 100th anniversary. If it's a mystery to you how you wound up sharing quarters with the beautiful woman who is the love of your life, maybe this is a good day to celebrate the mystery that perhaps even a G-man couldn't solve.


This one is a top fold style greeting card.  The image for the front is upside down to the image on the inside of the card.  Don't forget to print the back upside down to the front in portrait mode, flipping it on the long side, not the short.  Then fold it over and you have your card ready to arrest her attention!

(c) 2013 by Tom King


Thursday, July 25, 2013

Greeting Card Campaign: 7-25 Act Like a Caveman Day

Not sure where this one came from - probably from people who like hair-dragging or perhaps those who enjoy being dragged.  There's no accounting for tastes.  At any rate, as a celebration, "Act Like a Caveman" Day is as good an excuse as any for tossing a mastodon on the barbie.


This is a side-fold card.  Like all side-fold cards download the pictures by right-clicking on them and then choosing "save image as".  Drop the images into your document. They're sized so they fill up the whole page.  Print front and back on cardstock so that the tops of both pages face the same direction, front and back. When you're done, who knows?  Perhaps you're favorite cavegirl may be in the mood to join in a bit of hair-dragging, stalactite rattling fun back in the old cave.  You never know.

© 2013 by Tom King

Greeting Card Campaign: 7-24 Tell an Old Joke Day

Today we celebrate ancient old jokes - the sort the cavemen told to the dinosaurs (Three trilobites walk into a bar....).  For today we've come up with a little self-deprecating humor so as not to imply in any way that your Sweet Baboo is any sort of joke, old or new.  The spoof here is based on the chicken crossing the road joke, the venerable light bulb joke and the knock knock joke.


It's a side fold card.  Download the images, drop them into your word processor or publishing document and print in landscape with both images upright on the front and the back of the cardstock you print the card on.  

Look up some elderly jokes and have a laugh.

© 2013 by Tom King

Tuesday, July 23, 2013

Greeting Card Campaign: 7-16 International Juggling Day

Okay, my source de' holidays failed me last week.I was misinformed by a normally reliable website as to the correct day for National Hot Dog Day which is July 23 - today! Of course, this is also National Hot Dog Month, so who cares? We can technically celebrate hot dogs every day in July and how cool is that?

To make up for the missing day, I offer this sweet card for July 16th - International Juggling Day.  Tell her she keeps your world spinning. You don't have to tell her Juggling Day was last week.  You'll get it right next year. 

Anyway, the Hot Dog Day card I did on the 16th should actually be for today.  I would have done "Mosquito Day" which is also today, but I couldn't think of anything romantic about mosquitoes (at least nothing serious).  To make up for the mistake, I'm offering a catch up card for the 16th of July which is actually International Juggling Day, a day to not only appreciate juggling as a performing art, but to tell your Sweetheart that she keeps your world spinning.


This is a simple side-fold card.  Print it in landscape view with both sides right side up in landscape view.  Sign your name above the bit about being her favorite clown.  Should get you a smooch.  At least that's the idea.  Right click on the images and download by clicking on "save as".  They are for your personal use only. The copyright is just to protect the ideas for my own ebook of greeting cards (which it will take me a year to create apparently.

Anyway, if I get time later, I'll do another one for today which is also, I discovered, "Ice Cream Cone Day" and "Vanilla Ice Cream Day" - rather redundant perhaps, but then how can ice cream be redundant? Or you can celebrate Hot Dog Day Part Dieux, or just blow it all out and have hot dogs AND ice cream.


© 2013 by Tom King

Monday, July 22, 2013

Greeting Card Campaign: 7-22 Hammock Day

Happy Hammock Day everybody.  It's the middle of the dog days of summer and a great day to sling your hammock from a tree and take the nap you missed back on National Nap Day.  No one really knows where Hammock Day came from.  The inventor apparently strung his hammock and proceeded to take a nap and didn't write anything down. 

Outside of card

Inside of Card
Next to Nap day this could be one of my favorite holidays.  This is a top fold card. Print it in profile with the second page upside down to the first if flipped on the long side.  Make sure the inside image is pasted upside down on the back of the front page and size it to the full page.  Download the images by right clicking and click again on "save image as". You know the rest.  Have a nice nap in your hammocks everybody.  I'm already sleepy.

Tom King - © 2013

Sunday, July 21, 2013

Greeting Card Campaign: National Ice Cream Day

In 1984, President Ronald Reagan (Republican) officially declared July as National Ice Cream Month, and established National Ice Cream Day as the third Sunday in July.  Why celebrate?
  1. Why not?
  2. Our womenfolk LOVE ice cream?
  3. It keeps cows occupied.
  4. It encourages cute pictures of babies putting their faces into ice cream cones.
  5. It gives us an excuse to drag out the old ice cream freezer


This year (2013) we celebrate National Ice Cream Day on Sunday, July 21, 2013.  That date is also  National Junk Food Day.  It's something of a coincidence that they fall on the same day this year.  I'll also be posting an NJFD card for the 21st of July since that's a fixed-date holiday, whereas National Ice Cream Day is on a specific day of the week. 

This card is a side fold card, so the only trick to printing it is to make sure the text on both sides is the same way up.  It's not opposite facing like a top fold card.  I'm working on a CD collection of pdf files for every holiday for every day of the year so you can keep 'em coming like clockwork.  Feel free to download the images and slap them on a full page in your word processor or publishing software.  Print on cardstock front and back both sides facing the same way (flipped on the short side if you're using a printer that does double sided printing).


Have fun.  Bring your wife ice cream in bed.  I find that an effective technique for encouraging National Ice Cream Day celebrations. After you've enjoyed your ice cream, do something energetic to work off the calories. Be creative.


© 2013 by Tom King

Saturday, July 20, 2013

Greeting Card Campaign: 7-20 Nap Day

Grab a chaise lounge out in the yard, spread a blanket at the beach, string a hammock between two trees or curl up on your bed under a ceiling fan with the air conditioner turned up.  It's Nap Day - a celebration of snoozing, a time to get comfy and a time to cuddle. 


This card is a top fold, so after you right click on the pictures below and download them place them in your double-sided document so the front of the page or outside of the card is upside down and the back or inside is right way up.  Print on a nice cardstock and leave it on her pillow in the morning before she wakes up.

Follow up with an invitation to an impromptu nap in the afternoon.  Wear a nice cologne in case it takes a little while to doze off. 

© 2013 by Tom King

Friday, July 19, 2013

Greeting Card Campaign: 7-19 Flitch Day

Flitch Day is an odd little ceremony that was common in 15th century England and may have existed on mainland Europe as far back as Saxon times.  The holiday, traditionally celebrated on the 19th of July, survived into the 1700s with remnants of the custom still surviving in remote areas of England. The festival involved setting up a panel of judges before which couples presented themselves for cross-examination.  The couple had to swear before the judges that they had been married for at least a year and a day and that they didn't regret having married.  If they convinced the judges and survived cross-examination by the appointed prosecutor, then they were awarded a flitch of bacon. 

By all accounts the awarding of the flitch was an very rare event, the English apparently having a distinct skepticism where happiness and the institute of matrimony are concerned.

Declare your support for marital bliss today by buying your blushing bride a flitch of bacon and giving her an attractive card with your handwritten declarations of love inscribed at the bottom in the blank space provided.
Print the inside rightside up

Print the outside upside down


This is a top fold card, so, place the pictures in your document in portrait orientation, covering the whole page, facing opposite directions (one up/one down) on the front and back of some nice cardstock - something in a nice bacon-pink color would be perfect.  Print the pages in portrait mode with the pictures facing opposite ways when flipped along the long edge.

Remember, nothing says, "I love you" like a huge slab of BACON!  It's a very romantic gift that keeps right on giving.  For you vegetarians out there, a case of veggie bacon is always a big hit with the missus.

© 2013 by Tom King

Thursday, July 18, 2013

Greeting Card Campaign: 7-18 Sidewalk Frying Day

Not sure who came up with this one, but it was probably a hot day in July.  This holiday card gives you an opportunity to tell her how hot she is!  Can't beat that with a skillet and in the July heat you don't even need one.


This one is a side folded card.  Right click and save the images to your computer.  Create a side ways paged (landscape) document.  Place both pictures right side up in landscape format so that the front greeting and picture of the card is on the right half of the outside and the inside is right way up on the second page. If you print two-sided flip on the short side.

Maybe some scrambled eggs (in a skillet doofus) for breakfast in bed.  Or maybe do some other kind of sizzling.  Have fun, whatever you do.  The weather service has asked, however, that local TV news reporters stop frying eggs on the sidewalk in front of the US Weather Bureau. It's getting kind of icky out there.

© 2013 by Tom King

Wednesday, July 17, 2013

Greeting Card Campaign: 7-17 Get out of the Doghouse Day

If you seem to stay in trouble more than you stay out of trouble (and frankly, you probably wouldn't have been reduced to the extreme of sending a card per day if you weren't that sort of doofus), then today is your day.

It's "Get Out of the Doghouse Day"!  Yeah!

Today is the day when, according to ancient tradition, your wife has to forgive you if you get on your knees and confess your failures and shortcomings (and bring her an unburnt breakfast in bed or better yet, a brunch at her favorite bistro.
Inside of card

Outside of card


This is a top fold card, so print the second page upside down on the back of the first page.  As with all of these, insert the pictures into your Word or publishing software document so they cover the full front and back of a single sheet of card stock.  Download the images by right clicking and choosing "Save image as".

Be careful, though.  This is a day to beg for giveness, not demand it. Start demanding your right to forgiveness and it could easily turn into "Bury Your Husband Under the Back Porch Day."

I'm just sayin'

© 2013 by Tom King

Tuesday, July 16, 2013

Greeting Card Campaign: 7-23 - National Hot Dog Day


July 23 is National Hot Dog Day.  We continue our year long campaign of greeting cards with a tender and romantic message for National Hot Dog Day.  What says "romance" better than a nice, well-roasted frankfurter.


This is a vertical card. Place the jpeg files in landscape mode on landscape oriented pages on back to back pages in your document.  Print them so that both pages print so that the tops of the pictures face the same direction.  Print them on a nice cardstock.

Have fun and enjoy the dogs...

© 2013 by Tom King


Monday, July 15, 2013

Greeting Card Campaign: 7-15 National Tapioca Day


July 15th is National Tapioca Day - a celebration of all things tapioca. If your beloved doesn't like tapioca, you can always celebrate National Nude Day today, but I ain't makin' no card for that one. You're on your own there. This is a family site. 


I've chosen a kind of sappy romantic theme featuring pudding AND peaches.  These are the graphics (above) for the outside and inside of the card.  Just paste them as full page graphics on the front and back of the page in your document file.  You can use Word or Publisher, PageMaker (like I did) or any other publishing software.  The second page should be printed upside down compared to the first which is why the photo scan is upside down  That way the greeting will be at the bottom of the inside page.  This is a top fold card.  You can buy blank greeting card stock with a nice prefold in it or go cheap like me and buy straight cardstock and fold it yourself. 

I've also included a nice recipe for Tapioca Pudding & Peaches below if you want to get jiggy with the special effects. Nothing says I love you like a sweet treat.  For those of you guys doing something with whipped cream and a big red bow, just don't tell us about it, okay. I don't even want to imagine that.


Tapioca Pudding
With Peaches


Ingredients
·       2 cups (2%) milk
·       1 egg
·       tbsp tapioca
·       1½ cups coarsely diced fresh peaches
·       3 tbsp no-sugar apricot spread
·       1 tsp vanilla

Preparation:
1.     Beat egg lightly. Add milk, egg and tapioca to saucepan and allow it to sit for 5 minutes. 
2.     Stir peaches and apricot spread into mixture.
3.     Heat and stir over medium heat until the pudding comes to a boil.
4.     Cook for 1 minute after the pudding starts to boil. Remove from heat and stir in vanilla.
5.     Cool slightly; stir. Place plastic wrap directly on surface of pudding; chill.

Makes 4 servings.  If you can't get fresh peaches, you can use frozen peaches if you add 1 or 2 packages of artificial sweetener or 4 teaspoons of sugar to the milk mixture.


Tom King - © 2013